
Stage plots for touring bands: what to include and how to keep them useful
What to include on a touring stage plot, and how to keep it useful when rooms and setups change every night.
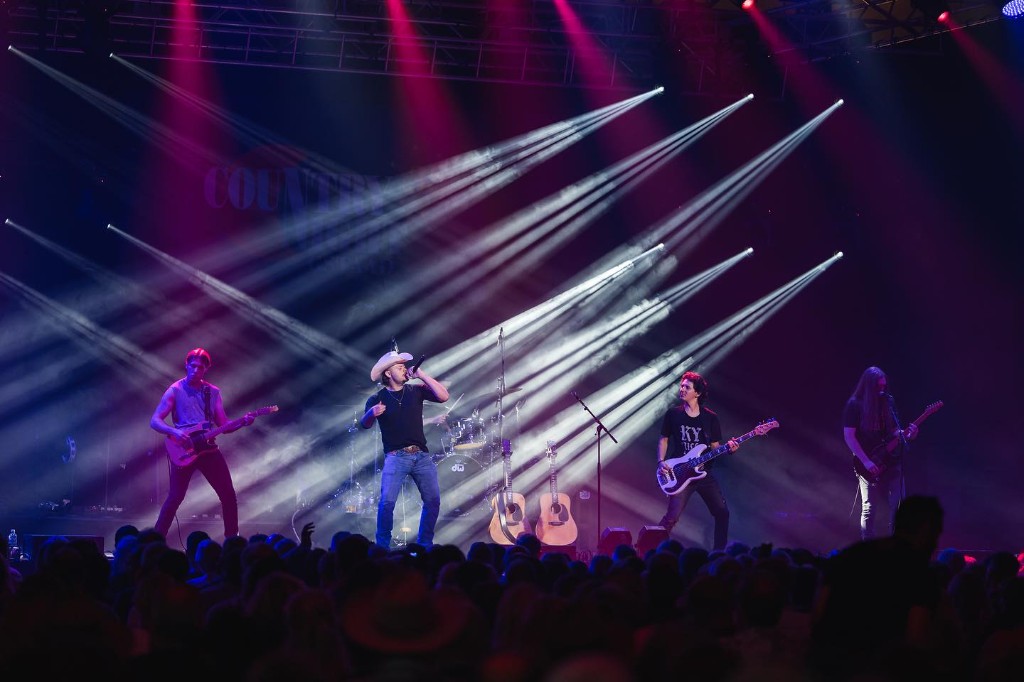
Touring changes what you need from a stage plot. For a one-off local show, you can sometimes get away with sending a rough diagram, answering a few questions over email, and sorting out the rest when you arrive. On tour, that same approach gets old quickly. You are loading into a different room every day. The venue may have never seen your band before, and the person receiving your advance may not be the person working the show. Available gear changes, stage sizes change, and monitor setups change. Sometimes you have plenty of time to sort everything out, and sometimes you are trying to get a full band on stage while doors are getting uncomfortably close. A good touring stage plot gives each venue a clear picture of your setup before you arrive. It should answer the important questions quickly while still being easy enough to update when something changes halfway through the run.
What is a touring stage plot?
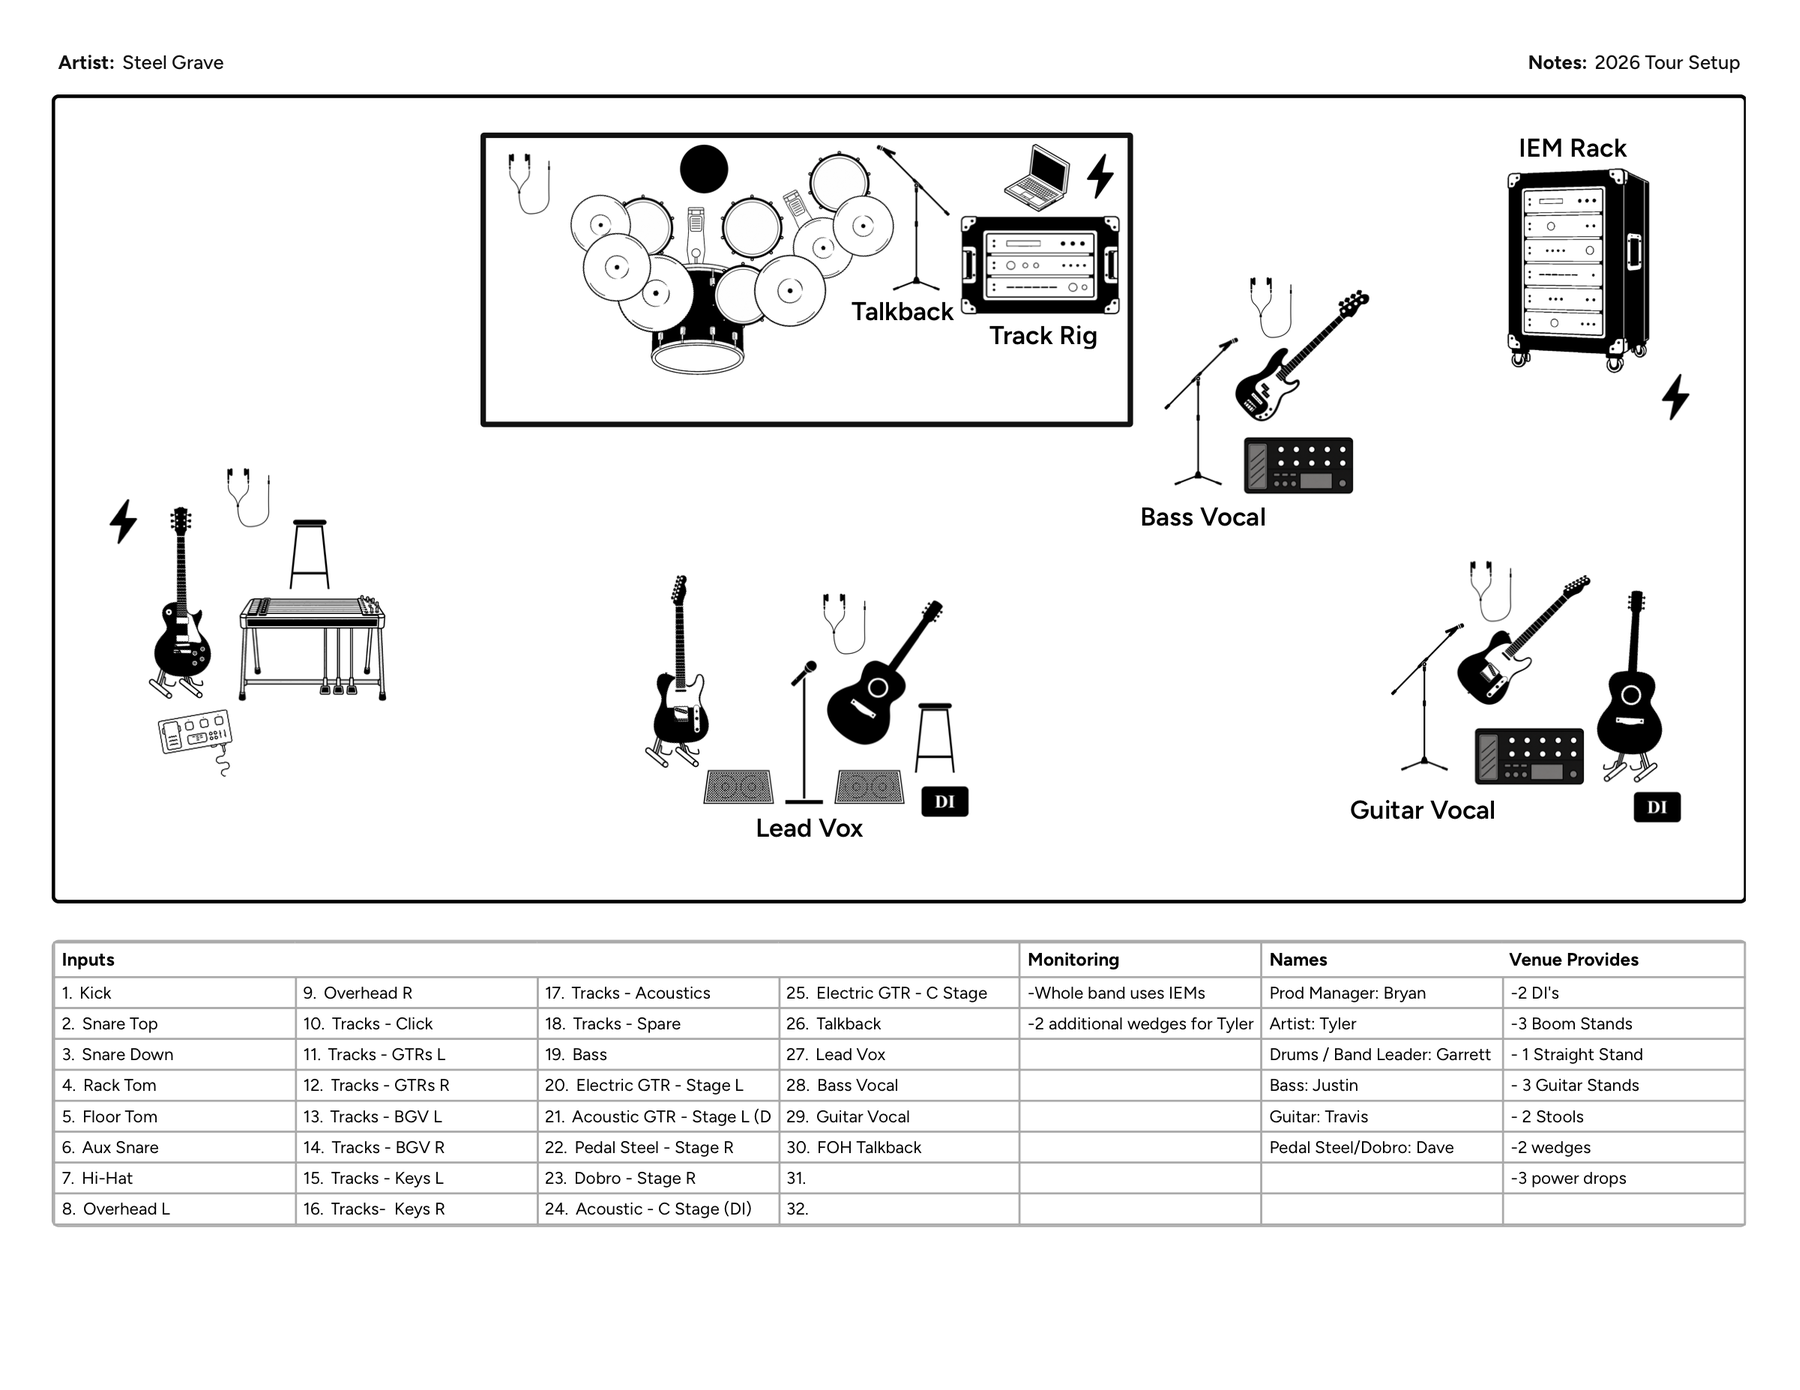
A stage plot is a visual map of where musicians, instruments, amps, monitors, microphones, DI boxes, and other equipment should be positioned on stage. For a touring band, it becomes part of the show's technical advance. It helps the venue understand what you are bringing, what you need from them, and how the stage should be prepared before load-in. The most useful stage plots are usually paired with an input list showing the audio channels required for the show. For example, the plot might show that the drummer is upstage center, guitar amps are positioned stage left and right, and three vocal microphones are across the front of the stage. The input list provides the next layer of information:
- Kick
- Snare
- Rack tom
- Floor tom
- Overheads
- Bass DI
- Guitar microphones
- Lead vocal
- Background vocals
- Tracks
- Other playback or instrument channels
Together, those two pieces give the production team a much clearer idea of what your show requires.
Why stage plots matter more on tour
The biggest advantage of a touring stage plot is consistency. Your band might play a 250-cap club one night, a festival the next afternoon, and a larger venue the following evening. The rooms may be completely different, but your basic stage setup probably is not. That makes your stage plot a reference point. It tells each production team, "This is what we're trying to build." The venue can then adapt that setup to the realities of its room. That distinction is important. A stage plot does not need to dictate every inch of the stage. It needs to communicate your preferred setup clearly enough that the people working the show can prepare for it. Good technical information cuts down on questions during load-in and gives everyone a better starting point.
Your touring stage plot should be easy to scan
A stage plot is not something you should assume someone will study for twenty minutes. There is a good chance a production manager or FOH engineer will look at it quickly while working through several other advancing emails. There is also a chance someone sees it for the first time shortly before your set. Design accordingly. Someone looking at your plot should be able to quickly identify:
- how many musicians are on stage
- where each musician stands
- where the drum kit goes
- where amps and cabinets are positioned
- how many vocal microphones you need
- whether you use wedges or in-ear monitors
- where DI boxes are required
- whether you have tracks or playback equipment
- anything unusual about your setup
If someone needs to decode the diagram, the plot is working against you.
Keep the stage plot and input list together
This is one of the biggest improvements a touring band can make to its advance. Avoid creating a stage plot in one file, an input list in another spreadsheet, monitor notes in an email, and additional details in a text message. That information becomes surprisingly easy to separate. Ideally, the venue should be able to open one document and understand the setup. Your visual stage layout tells them where things go. Your input list tells them what gets connected. Your notes explain any important details that cannot be communicated visually. Keeping those together also makes your own life easier when the setup changes.
Build around your normal setup
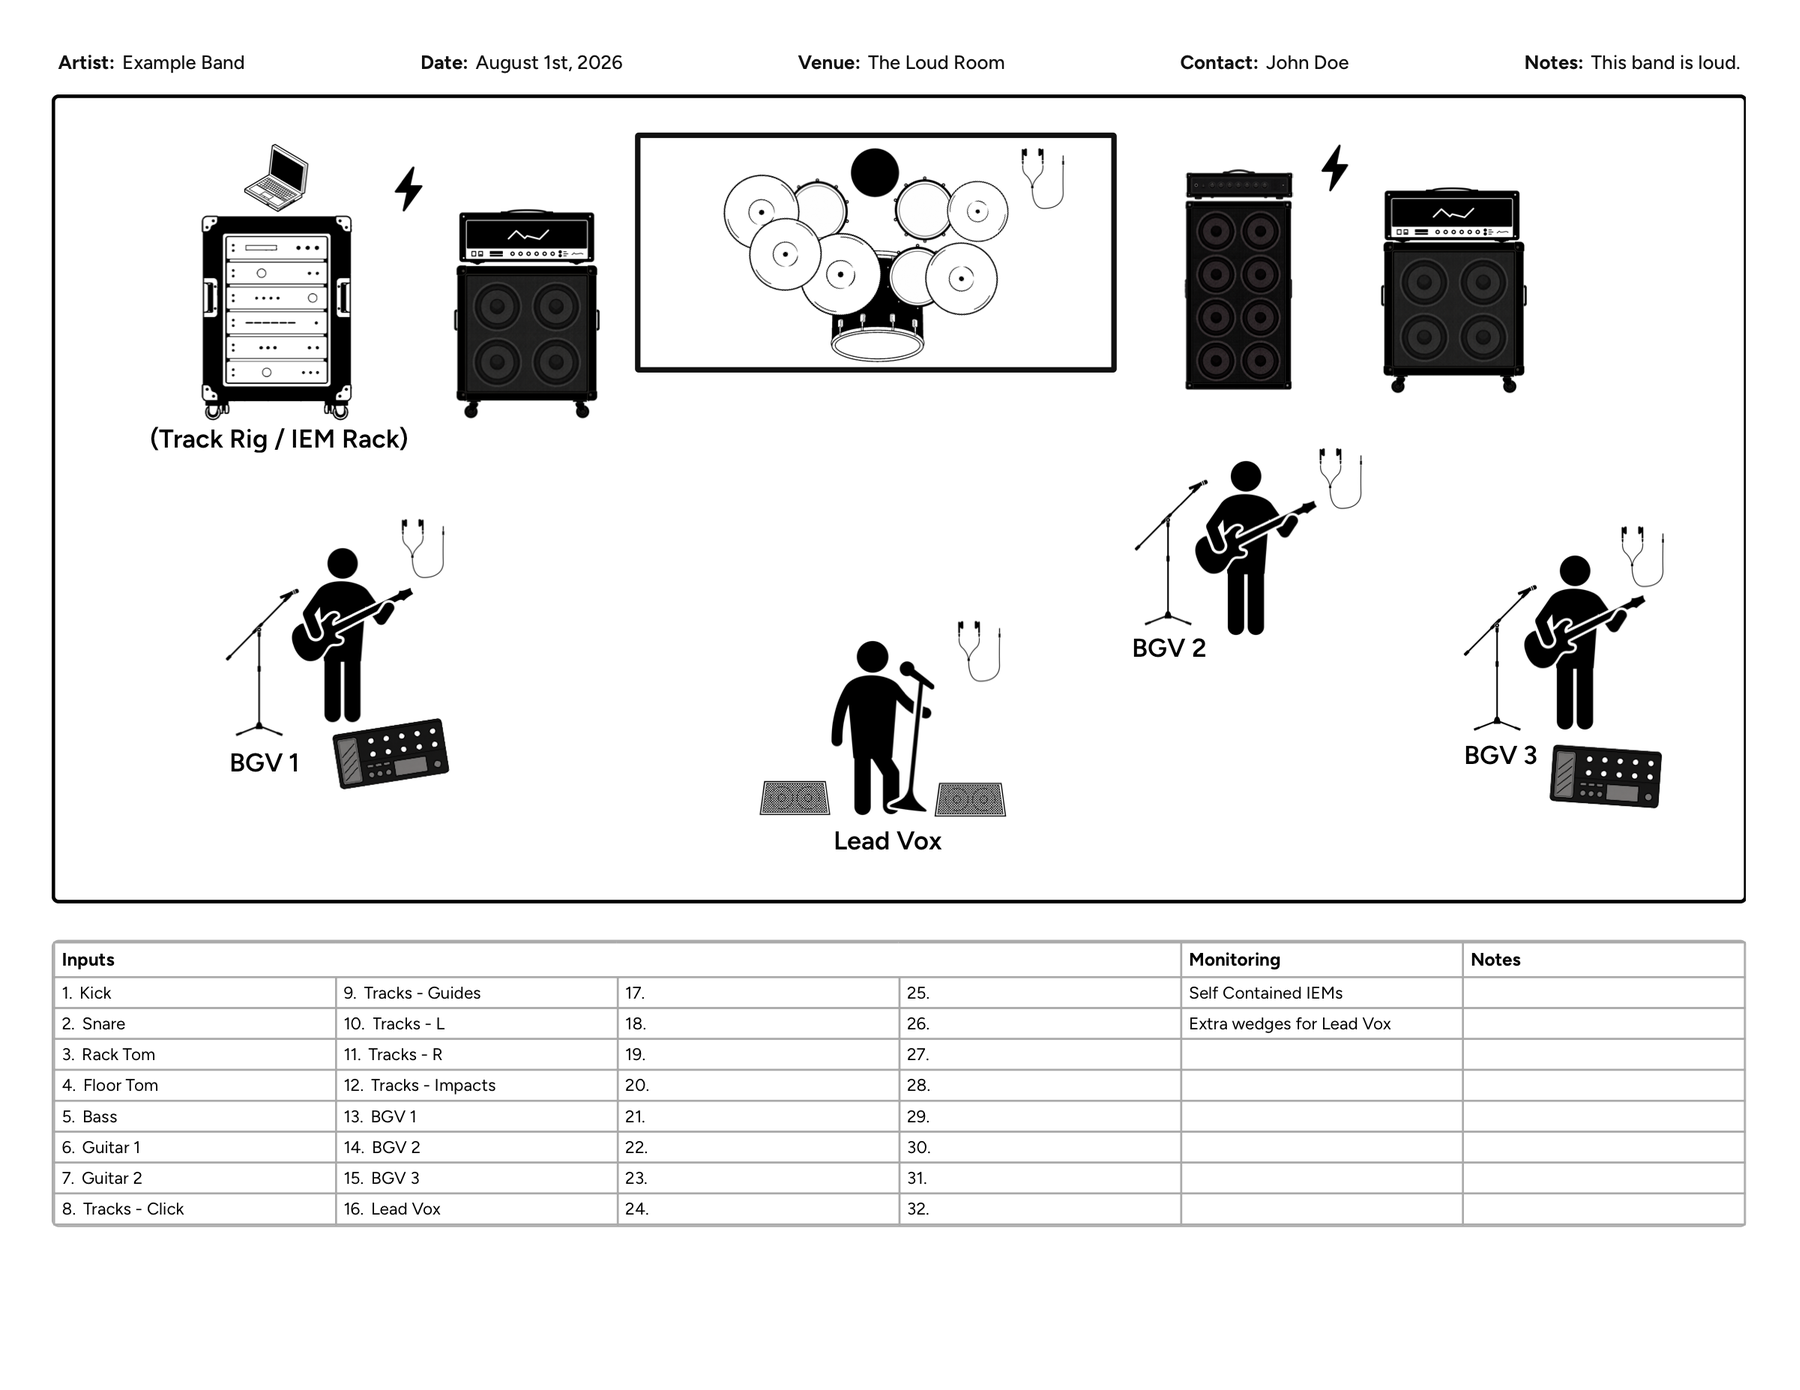
Your primary touring plot should represent the version of the show you expect to play most nights. Do not try to design one diagram that accounts for every possible venue. If your normal setup is:
- drums upstage center
- bass stage left
- guitar stage right
- lead vocal downstage center
- two background vocals
- stereo tracks
- three monitor mixes
then build the plot around that configuration. A smaller venue may need to squeeze things together. A festival may provide a completely different monitor system. An opening slot may require you to work around the headliner's backline arrangement. That is fine. Your plot communicates the baseline. The production conversation handles the exceptions.
Clearly distinguish what you bring and what you need
One of the most useful things you can communicate during an advance is equipment responsibility. If your band travels with its own microphones, DI boxes, IEM rack, playback rig, stands, or backline, make that clear. Likewise, specify anything you expect the venue to provide. For example:
Band provides:
- drum kit
- guitar and bass rigs
- IEM rack
- vocal microphones
- playback laptop and interface
Venue provides:
- drum microphones
- mic stands
- AC power
- PA
- required XLR runs
The exact division will vary enormously between tours, but ambiguity is what causes problems. If the engineer assumes you are bringing something and you assume they are providing it, you may not discover the problem until load-in.
Include monitor information without overcomplicating the plot
Monitor needs are especially important on tour. If your band uses wedges, indicate where they should go and which musician each mix belongs to. If you travel with an IEM system, show enough information for the venue to understand how it connects to their system. You do not necessarily need to document every detail of an elaborate monitor rig directly on the stage plot. Sometimes a separate technical rider or notes section is more appropriate. The goal is to communicate what the venue needs to prepare.
A useful rule is this: Put spatial information on the plot. Put detailed routing information in the input list or notes. That keeps the stage diagram readable.
Include your tracks and playback setup
Tracks are increasingly common in touring setups, and they are also an easy source of confusion. If you use playback, make the outputs obvious. For example:
- Tracks L
- Tracks R
- Click
- Timecode
- Playback DI L/R
If click only goes to your band's monitoring system and never reaches FOH, make that clear too. Your stage plot can show the playback rig's physical location, while the input list explains what signals production receives. This is much better than telling the engineer, "We'll explain the tracks when we get there."
Use names that make sense to someone outside your band
Bands develop their own shorthand very quickly. Production crews do not know it. If your band calls a piece of equipment "the spaceship," "the brain," or "Steve's weird box," that may be perfectly useful internally and completely useless to a venue. Use conventional names wherever possible:
- Guitar Amp
- Bass DI
- Playback Rig
- Tracks L
- Tracks R
- Acoustic DI
- Vocal 1
- Vocal 2
You can always add clarification in the notes. The same principle applies to musicians. Labeling positions by role is often more useful than using first names alone. "Lead Vocal / Guitar" tells an unfamiliar engineer more than "Mike."
Keep a master plot and update it when the tour changes
Touring setups evolve. Someone changes pedalboards. A wireless unit gets added. You stop carrying an amp. A new playback rig replaces the old one. A monitor mix changes. A microphone gets added to the drum kit. Your stage plot should evolve with the show. Keep one master version that represents the current setup and update it as changes happen.
This sounds obvious, but outdated technical documents are extremely common. An old plot can actually be worse than no plot because the venue may prepare for equipment that is no longer part of the show. Put a date or version somewhere on the document if your setup changes frequently. Something as simple as Updated: September 2026 can help everyone confirm that they are looking at the current version.
Make changes before they become venue problems
One of the advantages of having an editable touring plot is being able to make a small change once instead of explaining it repeatedly. If you add a second guitar cabinet halfway through the tour, update the plot. If the drummer switches to a smaller kit, update the plot. If you stop using wedges and move entirely to IEMs, update the plot. The next venue now receives the correct information without anyone needing to remember an extra sentence in every advance email. That becomes increasingly valuable over a long run.
Do not try to make the plot beautiful at the expense of clarity
Professional does not mean elaborate. The venue does not need an artistic rendering of your stage. They need a diagram that is:
- readable
- accurate
- logically arranged
- clearly labeled
- easy to print
- easy to reference on a phone or laptop
Simple icons and labels are usually better than detailed graphics. White space and consistent naming are useful. Tiny text, decorative graphics, and complicated legends usually are not.
Think about how the document will actually be used
A touring stage plot may be viewed on:
- a production manager's laptop
- an FOH engineer's phone
- a venue computer
- a printed sheet at the console
- a tablet on stage
- an email attachment someone forwarded three times
That is why a conventional PDF remains useful. It is portable, easy to email, easy to print, and does not require the venue to use the same software you used to create it. Keeping the full plot and input list on a single page can be especially helpful when the setup is simple enough to allow it.
Build a plot that can survive different rooms
Your exact distances are going to change every night, so focus on relationships, not measurements. If the guitarist normally stands stage right of the drummer, communicate that. If the playback rig needs to stay near the drummer, show it there. If the bass player needs a vocal microphone, place it correctly. If two musicians share a keyboard rig, make that relationship obvious. The venue can compress or expand the layout based on the stage. A good touring plot should remain understandable whether the stage is 12 feet wide or 40 feet wide.
Talk to production when something is unusual
A stage plot is a communication tool, not a replacement for communication. If your setup includes something that could significantly affect production, mention it during the advance. That might include:
- unusually high channel counts
- self-contained IEM systems
- wireless frequency coordination
- MIDI or timecode requirements
- unusual power requirements
- large risers
- oversized backline
- electronic drums
- multiple playback computers
- extensive patching
- video synchronization
The plot gives the production team context. The advance gives you a chance to confirm that everything will actually work.
What I have learned from playing shows
As a drummer and working musician, I have seen stage plots created through just about every method imaginable. Bands use Photoshop, spreadsheets, screenshots, graphics apps, handwritten diagrams, PDFs built from several different programs, and sometimes nothing more than an email describing where everyone stands. Most of those approaches can work. The problem is that touring turns small inefficiencies into repeated ones. If changing one microphone requires editing three different documents, that might not matter for a single gig. Doing it while traveling and advancing another week of shows is a different story. That experience was part of why I built Stage Plot Designer. I wanted the stage layout and input list to live together, so making a change did not require rebuilding the entire advance package.
A touring stage plot checklist
Before sending your plot to the next venue, check that it includes:
- every musician and their stage position
- drum kit location and basic configuration
- guitar and bass amps or DIs
- keyboards and electronic instruments
- vocal microphones
- monitor or IEM positions
- playback and tracks equipment
- input list
- mic and DI preferences where relevant
- important production notes
- current contact information
- a recent version or update date
Then look at it once from the perspective of someone who has never seen your band. Could they understand the basic setup in thirty seconds? If so, you are probably in good shape.
The best touring stage plot is the one production can use
A touring stage plot does not need to account for every possible situation your band will encounter. It needs to communicate your normal show clearly, travel easily from venue to venue, and stay simple enough that you will actually keep it updated. Give production an accurate stage layout. Keep your input list with it. Clearly communicate anything unusual. Update the document when your setup changes, then send it early enough that the venue has a chance to use it.
That is ultimately the purpose of a stage plot: fewer surprises at load-in, less back-and-forth during the advance, and more time for everyone to focus on putting on the show.